

Sunday, September 12, 2010
Block number two

Thursday, September 9, 2010
Don't be too shocked... I've started!

Sunday, September 5, 2010
Time for a post....
 Hi All! Well the blog has been quiet for over a month now, and I guess that means that everyone is flat out busy with life in general, and hopefully finding time to have a bit of fun (and craft) in there somewhere.
I thought that I would give you some inspiration/a laugh and show you where I am at with the DJ blocks... Both my action plan and my method have changed as I have proceeded - typical. I started with A1, which incidentally took several hours, then did the easy blocks as recommended by Anthea. Then I decided that since the amount of fabric required is such an unknown I would do all the blocks of one of my largest colour ways and see how much extra I required - this plan I am sticking to and am in the middle of at present. So I am working my way through all my dark green blocks in whichever order I fancy.

Regarding the method I am doing freezer paper hand piecing with running stitch and initially was placing the freezer paper on the back, this didn't allow for fantastic accuracy though - as you can tell from my photos... The easy nine patch blocks I didn't use any paper at all just a pencil line to show seam edges. More recently I have been using the freezer parer on the front this allows the accuracy to be under a millametre and has the added bonus you can leave it on until you join the blocks to the sashing keeping them stable - this is a great find Anthea and how I am planning to finish of the remaining x blocks lol!
The first photo shows the fronts of the blocks I have done and the second the backs, the ones that look all white on the front are still wearing their freezer paper. The blocks are; A1, A4, A6, A8, B5, B13, E12, H1, H13, M6, M10, K4.
I'd love to see how everyone's blocks are going if you have the time to blog...
Take care xxx
Thursday, July 22, 2010
Finally a layout.........
Sorry it's taken me so long to post anything, but here it is my layout.............. Have also decided on the material; Black with White dots, Pale Blue with Darker Blue dots, and plain white. I am trying to be as organised about this as I can, so i have printed off all the blocks and sorted in a folder and that's about as far as I got before my little girls got sick again. Just over pneumonia and now some virus which has Amelia covered in a rash. Am hoping to get a few hours this weekend for my first attempt at quilting, there maybe a few calls to Anthea for help.


 Have also decided on the material; Black with White dots, Pale Blue with Darker Blue dots, and plain white. I am trying to be as organised about this as I can, so i have printed off all the blocks and sorted in a folder and that's about as far as I got before my little girls got sick again. Just over pneumonia and now some virus which has Amelia covered in a rash. Am hoping to get a few hours this weekend for my first attempt at quilting, there maybe a few calls to Anthea for help.
Tuesday, July 20, 2010
Useful Links
Hello!
Just been surfing for some other piecing methods, and found this freezer paper method that might be useful for the blocks that are appliqued. I found it directly from the Dear Jane site, and the tips on individual blocks are very helpful there too - A-G & H-M.
Some eye candy:


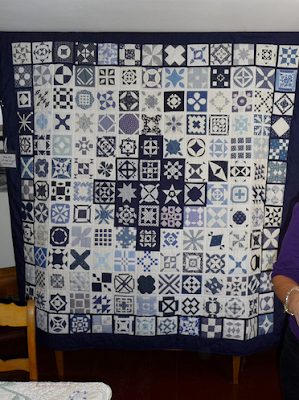

Just been surfing for some other piecing methods, and found this freezer paper method that might be useful for the blocks that are appliqued. I found it directly from the Dear Jane site, and the tips on individual blocks are very helpful there too - A-G & H-M.
Some eye candy:


Happy quilting! Anthea x
Saturday, July 17, 2010
Hand Piecing - the Anthea Way
Hi there everyone! Sorry I haven't done this any sooner, it's been very busy around these parts hosting birthdays and with a sick bub, but here it is... the hand piecing tutorial - the Anthea way! This is not necessarily the only way it can be done, and indeed might not be the 'proper' way. I taught myself, and through some trial and error - it works for me.
Step 1
Print out the block pattern onto a piece of card (does not need to be too heavy). Number each pattern piece. I draw a quick sketch of the layout - particularly important when the pieces are more complicated. I've also been noting which block it is: M-10 for this example.

Step 2
Cut out each piece. (Pretty straight forward, I grant you).

Step 3
Cut out your fabric. I allow about 5-7mm all the way around. Then fold the allowance around tacking as you go. I usually have the thread knot on the 'good' side, as it makes it easy to remove later.


Step 4
I use Gutermann quilting thread which is a bit heavier than regular cotton. I tie a single not in it as shown.

Step 5
I start by inserting the needle directly through the corner (from the back behind the seam fold) and out of pieces 1 and 2.

Step 6
I then secure the corners together with a stitch.

Step 7
Then it is a matter of over stitching the pieces together. It just needs to be caught on the edge (you don't stitch through the card). They need to be stitched in order, the M-10: pieces 1, 2 & 3 together. Then 4, 5 & 6, then 7, 8 & 9. When the three strips are sewn together, they then can be sewn to one another. Ensure that each junction meets up with the corresponding one, by easing if necessary.

Voila!


7, 0, 0, 93
I hope this has been helpful. Let me know if anyone needs further info on certain steps - sometimes when you've done something for so long it is easy to overlook an obvious step. How is everyone else going?
Tuesday, July 6, 2010
Vicki's Layout!
Well after many hours of frustration both today, yesterday and the day before, I finally have a layout to offer. My software has some issues, it crashes, will not always zoom and continually adds lines around the border every time you click away from the worktop!
So after a huge whinge to Katie(Sorry!) and a lot of help from Anthea(Thanks!) I've decided to suck it up and post this anyway. Its the OCD in me that whispers "but its not perfect"...
 Opinions and Suggestions are welcome!
I also got a new laptop today so I am going to load the Dear Jane Software on it and see if I have the same problem or if it is just my old dinosaur.
Vicki. x
Subscribe to:
Posts (Atom)


